
Quick Find 置顶!

System
Firewalld
 1# 启动
 2systemctl start firewalld
 3
 4# 查看状态
 5systemctl status firewalld
 6
 7# 禁用,禁止开机启动
 8systemctl disable firewalld
 9
10# 停止运行
11systemctl stop firewalld
SyncTime
 1# 安装ntp服务
 2yum install ntp
 3
 4# 开机启动服务
 5systemctl enable ntpd
 6
 7# 启动服务
 8systemctl start ntpd
 9
10# 更改时区
11timedatectl set-timezone Asia/Shanghai
12
13# 启用ntp同步
14timedatectl set-ntp yes
15
16# 同步时间
17ntpq -p
18
19
20
21###  crontab
22[root@master tmp]# vi /tmp/synctime.sh
23#!/bin/bash
24systemctl restart ntpd
25timedatectl set-timezone Asia/Shanghai
26timedatectl set-ntp yes
27ntpq -p
28
29[root@master tmp]# crontab -e
30* * * * * /tmp/synctime.sh
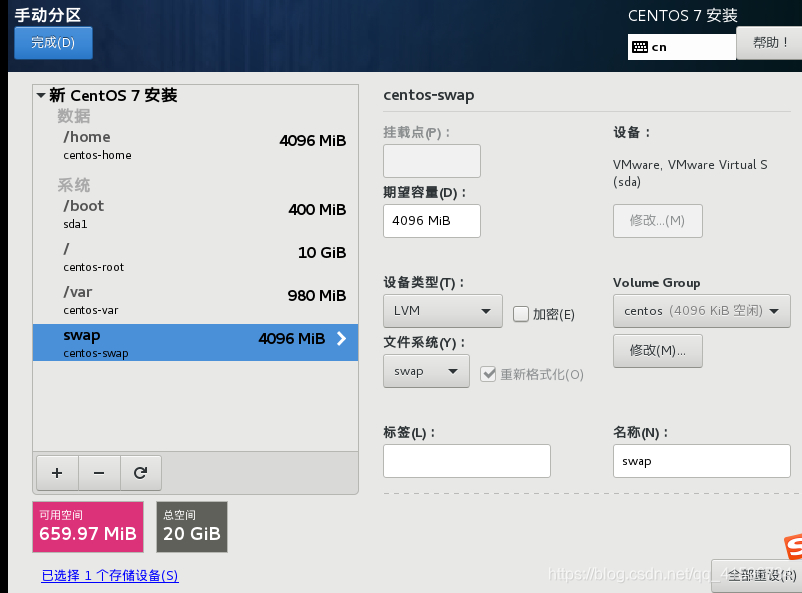
Partition
socks5 Agent
1[root@DevOps ~]# vim /etc/profile
2[root@DevOps ~]# source /etc/profile
3export ALL_PROXY="socks5://192.168.10.88:10808"
4export https_proxy="http://192.168.10.88:10809"
5export http_proxy="http://192.168.10.88:10809"
SpringBoot
启动类
 1package net.xdclass;
 2
 3import org.mybatis.spring.annotation.MapperScan;
 4import org.springframework.boot.SpringApplication;
 5import org.springframework.boot.autoconfigure.SpringBootApplication;
 6
 7@SpringBootApplication
 8@MapperScan("net.xdclass.mapper")
 9public class UserApplication {
10    public static void main(String[] args) {
11        SpringApplication.run(UserApplication.class,
application.yml
 1server:
 2  port: 9001
 3
 4spring:
 5  application:
 6    name: xdclass-user-service
 7
 8  # 数据库配置
 9  datasource:
10    driver-class-name: com.mysql.cj.jdbc.Driver
11    url: jdbc:mysql://192.168.10.21:3307/xdclass_user?useUnicode=true&characterEncoding=utf-8&useSSL=false&serverTimezone=Asia/Shanghai
12    username: root
13    password: abc1024.pub
14
15# 配置plus打印sql日志
16mybatis-plus:
17  configuration:
18    log-impl: org.apache.ibatis.logging.stdout.StdOutImpl
19
20# 设置日志级别,ERROR/WARN/INFO/DEBUG,默认是INFO以上才显示
21logging:
22  level:
23    root: INFO
Docker
Install
 1#安装并运行Docker。
 2yum install docker-io -y
 3systemctl start docker
 4
 5#检查安装结果。
 6docker info
 7
 8#启动使用Docker
 9systemctl start docker     #运行Docker守护进程
10systemctl stop docker      #停止Docker守护进程
11systemctl restart docker   #重启Docker守护进程
12
13
14#修改镜像仓库
15vim /etc/docker/daemon.json
16#改为下面内容,然后重启docker
17{
18"debug":true,"experimental":true,
19"registry-mirrors":["https://pb5bklzr.mirror.aliyuncs.com","https://hub-mirror.c.163.com","https://docker.mirrors.ustc.edu.cn"]
20}
21
22#查看信息
23docker info
MongoDB
配置文件
1net:
2    port: 27017
3    bindIp: "0.0.0.0"
4
5storage:
6    dbPath: "/data/db"
7
8security:
9    authorization: enabled
命令
 1docker run -it -d --name mongo \
 2-p 27017:27017 \
 3--net mynet \
 4--ip 172.18.0.8 \
 5-v /root/mongo:/etc/mongo \
 6-v /root/mongo/data/db:/data/db \
 7-m 400m --privileged=true \
 8-e MONGO_INITDB_ROOT_USERNAME=admin \
 9-e MONGO_INITDB_ROOT_PASSWORD=abc123456 \
10-e TZ=Asia/Shanghai \
11docker.io/mongo --config /etc/mongo/mongod.conf
Redis
配置文件
 1bind 0.0.0.0
 2protected-mode yes
 3port 6379
 4tcp-backlog 511
 5timeout 0
 6tcp-keepalive 0
 7loglevel notice
 8logfile ""
 9databases 12
10save 900 1
11save 300 10
12save 60 10000
13stop-writes-on-bgsave-error yes
14rdbcompression yes
15rdbchecksum yes
16dbfilename dump.rdb
17dir ./
18requirepass abc123456
命令
1docker run -it -d --name redis -m 200m \
2-p 6379:6379 --privileged=true \
3--net mynet --ip 172.18.0.9 \
4-v /root/redis/conf:/usr/local/etc/redis \
5-e TZ=Asia/Shanghai redis:6.0.10 \
6redis-server /usr/local/etc/redis/redis.conf
RabbitMQ
命令
1docker run -it -d --name mq \
2--net mynet --ip 172.18.0.11 \
3-p 5672:5672 -m 500m \
4-e TZ=Asia/Shanghai --privileged=true \
5rabbitmq
Minio
我们打开浏览器,访问 http://127.0.0.1:9001/login,然后填写好登陆信息,就能进入 Web 管理画面。 root abc123
目录
1docker load < Minio.tar.gz
2mkdir /root/minio
3mkdir /root/minio/data
4chmod -R 777 /root/minio/data
命令
 1docker run -it -d --name minio \
 2-p 9000:9000 -p 9001:9001 \
 3-v /root/minio/data:/data \
 4-e TZ=Asia/Shanghai --privileged=true \
 5--env MINIO_ROOT_USER="root" \
 6--env MINIO_ROOT_PASSWORD="abc123456" \
 7-e MINIO_SKIP_CLIENT="yes" \
 8bitnami/minio:latest
 9
10
11### 最新版
12docker run -it -d --name minio -m 400m \
13-p 9000:9000 -p 9001:9001 \
14-v /data/minio/data:/data \
15-e TZ=Asia/Shanghai --privileged=true \
16--env MINIO_ROOT_USER="root" \
17--env MINIO_ROOT_PASSWORD="abc123456" \
18bitnami/minio:latest
19
20http://192.168.10.21:9001/login
Nacos
http://localhost:8848/nacos/
nacos
nacos
 1docker run -it -d -p 8848:8848 --env MODE=standalone \
 2--net mynet --ip 172.18.0.12 -e TZ=Asia/Shanghai \
 3--name nacos nacos/nacos-server
 4
 5### new
 6docker run -d \
 7-e NACOS_AUTH_ENABLE=true \
 8-e MODE=standalone \
 9-e JVM_XMS=128m \
10-e JVM_XMX=128m \
11-e JVM_XMN=128m \
12-p 8848:8848 \
13-e SPRING_DATASOURCE_PLATFORM=mysql \
14-e MYSQL_SERVICE_HOST=192.168.10.58 \
15-e MYSQL_SERVICE_PORT=3306 \
16-e MYSQL_SERVICE_USER=root \
17-e MYSQL_SERVICE_PASSWORD=abc1024.pub \
18-e MYSQL_SERVICE_DB_NAME=nacos_config \
19-e MYSQL_SERVICE_DB_PARAM='characterEncoding=utf8&connectTimeout=10000&socketTimeout=30000&autoReconnect=true&useSSL=false' \
20--restart=always \
21--privileged=true \
22-v /home/data/nacos/logs:/home/nacos/logs \
23--name xdclass_nacos_auth \
24nacos/nacos-server:2.0.2
Sentinel
打开浏览器访问 http://localhost:8858/#/login,然后填写登陆帐户,用户名和密码都是 sentinel
1docker run -it -d --name sentinel \
2-p 8719:8719 -p 8858:8858 \
3--net mynet --ip 172.18.0.13 \
4-e TZ=Asia/Shanghai -m 600m \
5bladex/sentinel-dashboard
MySQL
1docker run \
2    -p 3306:3306 \
3    -e MYSQL_ROOT_PASSWORD=123456 \
4    --name mysql \
5    --restart=always \
6    -d mysql:8.0
webssh
1docker run -d --name webssh -p 5032:5032 --restart always lihaixin/webssh2:ssh
Mybatis-plus-generator
依赖
 1<dependency>
 2        <groupId>com.baomidou</groupId>
 3        <artifactId>mybatis-plus-generator</artifactId>
 4        <version>3.4.1</version>
 5    </dependency>
 6    <!-- velocity -->
 7    <dependency>
 8        <groupId>org.apache.velocity</groupId>
 9        <artifactId>velocity-engine-core</artifactId>
10        <version>2.0</version>
11    </dependency>
12    <!-- 代码自动生成依赖 end-->
代码(标记 TODO 的记得修改)
 1package net.xdclass.db;
 2
 3import com.baomidou.mybatisplus.annotation.DbType;
 4import com.baomidou.mybatisplus.annotation.IdType;
 5import com.baomidou.mybatisplus.generator.AutoGenerator;
 6import com.baomidou.mybatisplus.generator.config.DataSourceConfig;
 7import com.baomidou.mybatisplus.generator.config.GlobalConfig;
 8import com.baomidou.mybatisplus.generator.config.PackageConfig;
 9import com.baomidou.mybatisplus.generator.config.StrategyConfig;
10import com.baomidou.mybatisplus.generator.config.rules.DateType;
11import com.baomidou.mybatisplus.generator.config.rules.NamingStrategy;
12
13public class MyBatisPlusGenerator {
14
15    public static void main(String[] args) {
16        //1. 全局配置
17        GlobalConfig config = new GlobalConfig();
18        // 是否支持AR模式
19        config.setActiveRecord(true)
20                // 作者
21                .setAuthor("soulboy")
22                // 生成路径,最好使用绝对路径,window路径是不一样的
23                //TODO  TODO  TODO  TODO
24                .setOutputDir("C:\\Users\\chao1\\Desktop\\demo\\src\\main\\java")
25                // 文件覆盖
26                .setFileOverride(true)
27                // 主键策略
28                .setIdType(IdType.AUTO)
29
30                .setDateType(DateType.ONLY_DATE)
31                // 设置生成的service接口的名字的首字母是否为I,默认Service是以I开头的
32                .setServiceName("%sService")
33
34                //实体类结尾名称
35                .setEntityName("%sDO")
36
37                //生成基本的resultMap
38                .setBaseResultMap(true)
39
40                //不使用AR模式
41                .setActiveRecord(false)
42
43                //生成基本的SQL片段
44                .setBaseColumnList(true);
45
46        //2. 数据源配置
47        DataSourceConfig dsConfig = new DataSourceConfig();
48        // 设置数据库类型
49        dsConfig.setDbType(DbType.MYSQL)
50                .setDriverName("com.mysql.cj.jdbc.Driver")
51                //TODO  TODO  TODO  TODO
52                .setUrl("jdbc:mysql://192.168.10.21:3307/xdclass_user?useSSL=false")
53                .setUsername("root")
54                .setPassword("abc1024.pub");
55
56        //3. 策略配置globalConfiguration中
57        StrategyConfig stConfig = new StrategyConfig();
58
59        //全局大写命名
60        stConfig.setCapitalMode(true)
61                // 数据库表映射到实体的命名策略
62                .setNaming(NamingStrategy.underline_to_camel)
63
64                //使用lombok
65                .setEntityLombokModel(true)
66
67                //使用restcontroller注解
68                .setRestControllerStyle(true)
69
70                // 生成的表, 支持多表一起生成,以数组形式填写
71                //TODO  TODO  TODO  TODO
72                .setInclude("user","address");
73
74        //4. 包名策略配置
75        PackageConfig pkConfig = new PackageConfig();
76        pkConfig.setParent("net.xdclass")
77                .setMapper("mapper")
78                .setService("service")
79                .setController("controller")
80                .setEntity("model")
81                .setXml("mapper");
82
83        //5. 整合配置
84        AutoGenerator ag = new AutoGenerator();
85        ag.setGlobalConfig(config)
86                .setDataSource(dsConfig)
87                .setStrategy(stConfig)
88                .setPackageInfo(pkConfig);
89
90        //6. 执行操作
91        ag.execute();
92        System.out.println("=======  Done 相关代码生成完毕  ========");
93    }
94}
SwaggerConfiguration
依赖
1<!--swagger ui接口文档依赖-->
2       <dependency>
3           <groupId>io.springfox</groupId>
4           <artifactId>springfox-boot-starter</artifactId>
5           <version>3.0.0</version>
6       </dependency>
SwaggerConfiguration
  1package net.xdclass.config;
  2
  3import lombok.Data;
  4import org.springframework.context.annotation.Bean;
  5import org.springframework.http.HttpMethod;
  6import org.springframework.stereotype.Component;
  7import springfox.documentation.builders.*;
  8import springfox.documentation.oas.annotations.EnableOpenApi;
  9import springfox.documentation.schema.ScalarType;
 10import springfox.documentation.service.*;
 11import springfox.documentation.spi.DocumentationType;
 12import springfox.documentation.spring.web.plugins.Docket;
 13
 14import java.util.ArrayList;
 15import java.util.List;
 16
 17@Component
 18@EnableOpenApi
 19@Data
 20public class SwaggerConfiguration {
 21
 22    /**
 23     * 对C端用户的接口文档
 24     *
 25     * @return
 26     */
 27    @Bean
 28    public Docket webApiDoc() {
 29
 30        return new Docket(DocumentationType.OAS_30)
 31                .groupName("用户端接口文档")
 32                .pathMapping("/")
 33                // 定义是否开启swagger,false为关闭,可以通过变量控制,线上关闭
 34                .enable(true)
 35                //配置api文档元信息
 36                .apiInfo(apiInfo())
 37                // 选择哪些接口作为swagger的doc发布
 38                .select()
 39                .apis(RequestHandlerSelectors.basePackage("net.xdclass"))
 40                //正则匹配请求路径,并分配至当前分组
 41                .paths(PathSelectors.ant("/api/**"))
 42                .build()
 43                //新版swagger3.0配置
 44                .globalRequestParameters(getGlobalRequestParameters())
 45                .globalResponses(HttpMethod.GET, getGlobalResponseMessage())
 46                .globalResponses(HttpMethod.POST, getGlobalResponseMessage());
 47    }
 48
 49
 50    /**
 51     * 生成全局通用参数, 支持配置多个响应参数
 52     * 可以携带 token 信息
 53     * @return
 54     */
 55    private List<RequestParameter> getGlobalRequestParameters() {
 56        List<RequestParameter> parameters = new ArrayList<>();
 57        parameters.add(new RequestParameterBuilder()
 58                .name("token")
 59                .description("登录令牌")
 60                .in(ParameterType.HEADER)
 61                .query(q -> q.model(m -> m.scalarModel(ScalarType.STRING)))
 62                .required(false)
 63                .build());
 64
 65//        parameters.add(new RequestParameterBuilder()
 66//                .name("version")
 67//                .description("版本号")
 68//                .required(true)
 69//                .in(ParameterType.HEADER)
 70//                .query(q -> q.model(m -> m.scalarModel(ScalarType.STRING)))
 71//                .required(false)
 72//                .build());
 73
 74        return parameters;
 75    }
 76
 77    /**
 78     * 生成通用响应信息
 79     *
 80     * @return
 81     */
 82    private List<Response> getGlobalResponseMessage() {
 83        List<Response> responseList = new ArrayList<>();
 84        responseList.add(new ResponseBuilder().code("4xx").description("请求错误,根据code和msg检查").build());
 85        return responseList;
 86    }
 87
 88    /**
 89     * api文档元信息
 90     * @return
 91     */
 92    private ApiInfo apiInfo() {
 93        return new ApiInfoBuilder()
 94                .title("1024电商平台")
 95                .description("微服务接口文档")
 96                .contact(new Contact("soulboy", "abc1024.pub", "410686931@qq.com"))
 97                .version("v1.0")
 98                .build();
 99    }
100}
AddressController
 1package net.xdclass.controller;
 2
 3import io.swagger.annotations.Api;
 4import io.swagger.annotations.ApiOperation;
 5import io.swagger.annotations.ApiParam;
 6import net.xdclass.service.AddressService;
 7import org.springframework.beans.factory.annotation.Autowired;
 8import org.springframework.web.bind.annotation.GetMapping;
 9import org.springframework.web.bind.annotation.PathVariable;
10import org.springframework.web.bind.annotation.RequestMapping;
11
12import org.springframework.web.bind.annotation.RestController;
13/**
14 * <p>
15 * 电商-公司收发货地址表 前端控制器
16 * </p>
17 *
18 * @author soulboy
19 * @since 2023-10-21
20 */
21@Api(tags = "收货地址接口")
22@RestController
23@RequestMapping("/api/address/v1")
24public class AddressController {
25    @Autowired
26    AddressService addressService;
27    @ApiOperation("根据id查找地址详情")
28    @GetMapping("find/{address_id}")
29    public Object detail(@ApiParam(value = "地址id",required = true)
30                             @PathVariable("address_id") long addressId){
31        return addressService.detail(addressId);
32    }
33}
访问地址
1http://192.168.10.88:9001/swagger-ui/index.html#/
Git
1git add ./*
2
3git commit -m "init2"
4
5git push -u origin "master"
Hyper-v
1### 关闭
2bcdedit /set hypervisorlaunchtype off
3
4### 开启
5bcdedit /set hypervisorlaunchtype auto
Docker 打包 Maven 插件配置
 1### 聚合工程pom添加全局变量
 2        <docker.image.prefix>xdclass-cloud</docker.image.prefix>
 3
 4### 每个微服务都添加依赖(服务名记得修改)
 5 <build>
 6        <finalName>alibaba-cloud-user</finalName>
 7
 8        <plugins>
 9            <plugin>
10                <groupId>org.springframework.boot</groupId>
11                <artifactId>spring-boot-maven-plugin</artifactId>
12
13                <!--需要加这个,不然打包镜像找不到启动文件-->
14                <executions>
15                    <execution>
16                        <goals>
17                            <goal>repackage</goal>
18                        </goals>
19                    </execution>
20                </executions>
21
22                <configuration>
23                    <fork>true</fork>
24                    <addResources>true</addResources>
25
26                </configuration>
27            </plugin>
28
29            <plugin>
30                <groupId>com.spotify</groupId>
31                <artifactId>dockerfile-maven-plugin</artifactId>
32                <version>1.4.10</version>
33                <configuration>
34
35                    <repository>${docker.image.prefix}/${project.artifactId}</repository>
36
37                    <buildArgs>
38                        <JAR_FILE>target/${project.build.finalName}.jar</JAR_FILE>
39                    </buildArgs>
40                </configuration>
41            </plugin>
42
43        </plugins>
44
45    </build>
Dockerfile
 1### Dockerfile文件内容
 2#FROM  adoptopenjdk/openjdk11:ubi
 3FROM  adoptopenjdk/openjdk11:jre11u-nightly
 4VOLUME /tmp
 5ARG JAR_FILE
 6COPY ${JAR_FILE} app.jar
 7ENTRYPOINT ["java","-jar","/app.jar"]
 8
 9### mvn打包命令()
10# 步骤一:最外层 mvn clean install
11mvn clean install
12
13# 步骤二:去到子模块pom文件下
14mvn install -Dmaven.test.skip=true dockerfile:build
front-end
cnpm
1npm install -g cnpm --registry=https://registry.npmmirror.com
Plan
- 工业级 PaaS 云平台 +SpringCloudAlibaba+JDK11 (SEATA)
- XXL-Job
- 容器编排 k8s 最佳实践 kubernetes+Rancher2.x
- 工业级 PaaS 云平台 +SpringCloudAlibaba+JDK11
- 海量数据处理-商用短链平台(58xueke : 77.4)